How to Create A Digital Signature in Photoshop
Digital signatures are so handy, yet so overlooked. It’s your stamp and your branding. It’s the best way to leave a mark anywhere in the digital world. They can also be applied in the real world, through print.
Formally, they can be used to sign off on emails and sign any digital document. They can also add a personal touch to CVs and cover letters.
Creatively, they can be used as a watermark on your artwork or social media content. They can also act as a logo for any part of your branding or business. For example, adding to merchandise.
1. Design
Grab a pen and paper. Draft and draw as many ideas as possible. Keep playing around with ideas, until you end up with something you like. Refine that idea, until you get a final signature you’re happy with.
 7
7
We recommend using a gel pen with a medium thickness. If you want a thick, smooth look, use a permanent marker. But this is your signature to represent you, so feel free to go with whatever fits your style. Maybe you want to use a fancy calligraphy pen or paintbrush.

Now you need to get your final signature into Photoshop. Photocopying is the most ideal way. But you can also take a photo with your phone or camera.
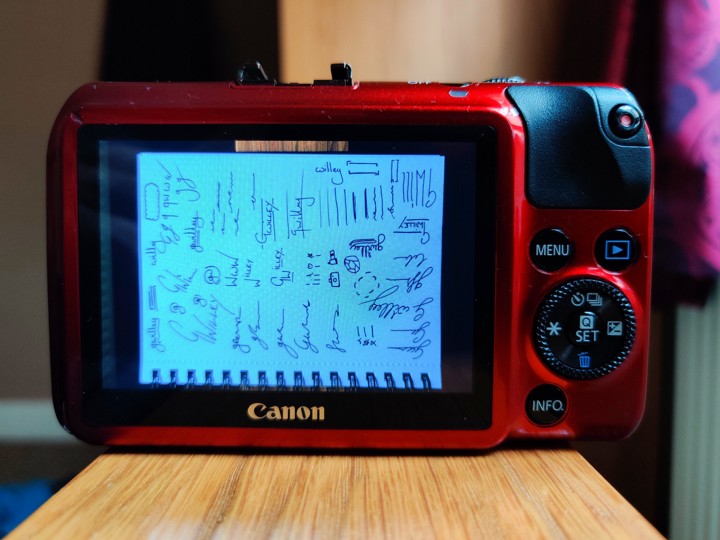
Import to your PC and drag into Photoshop, ready to digitalize your ink.
2.1 Digitalize
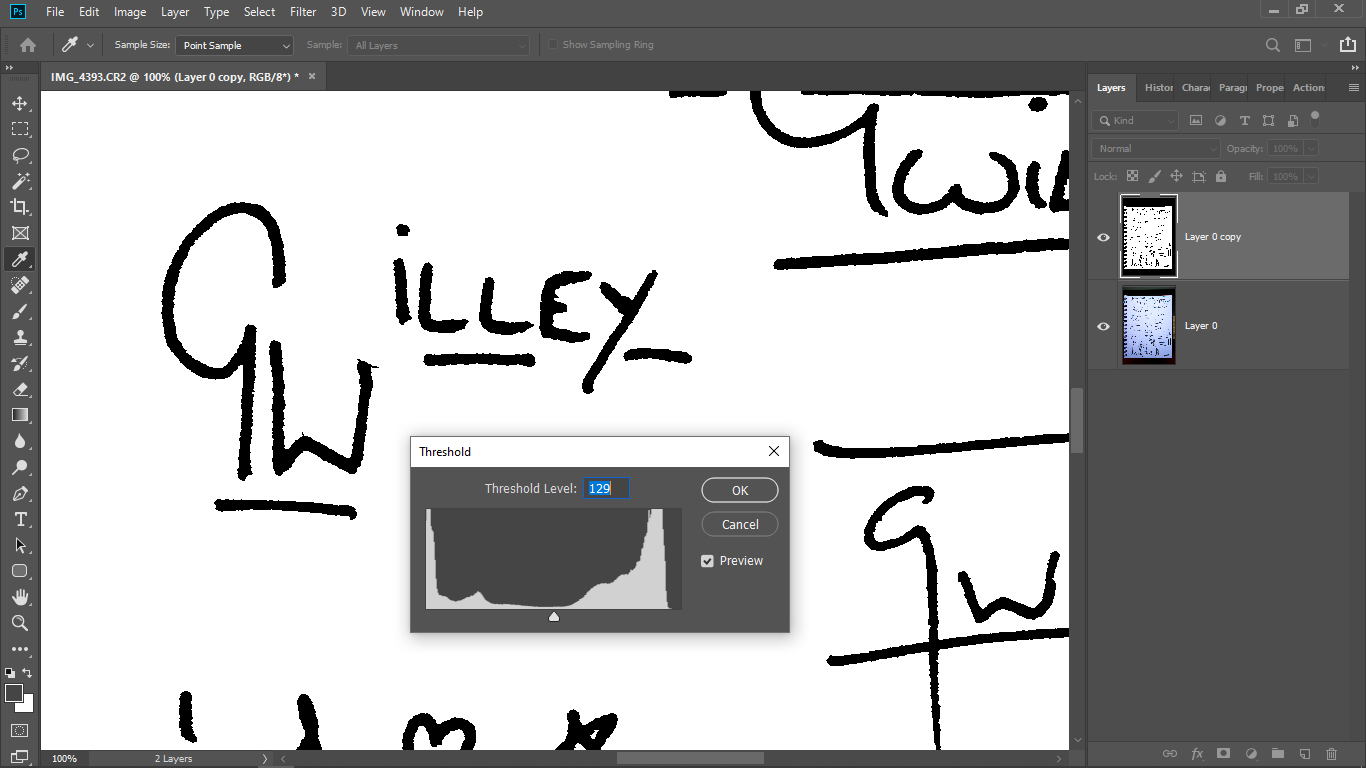
Go to Image > Adjustments > Threshold. This will force all pixels to be either black or white. This makes it easier to remove the background.
Zoom into the signature you want to create, and play around with the Threshold dial until you’re happy with how it looks. Press Okay.
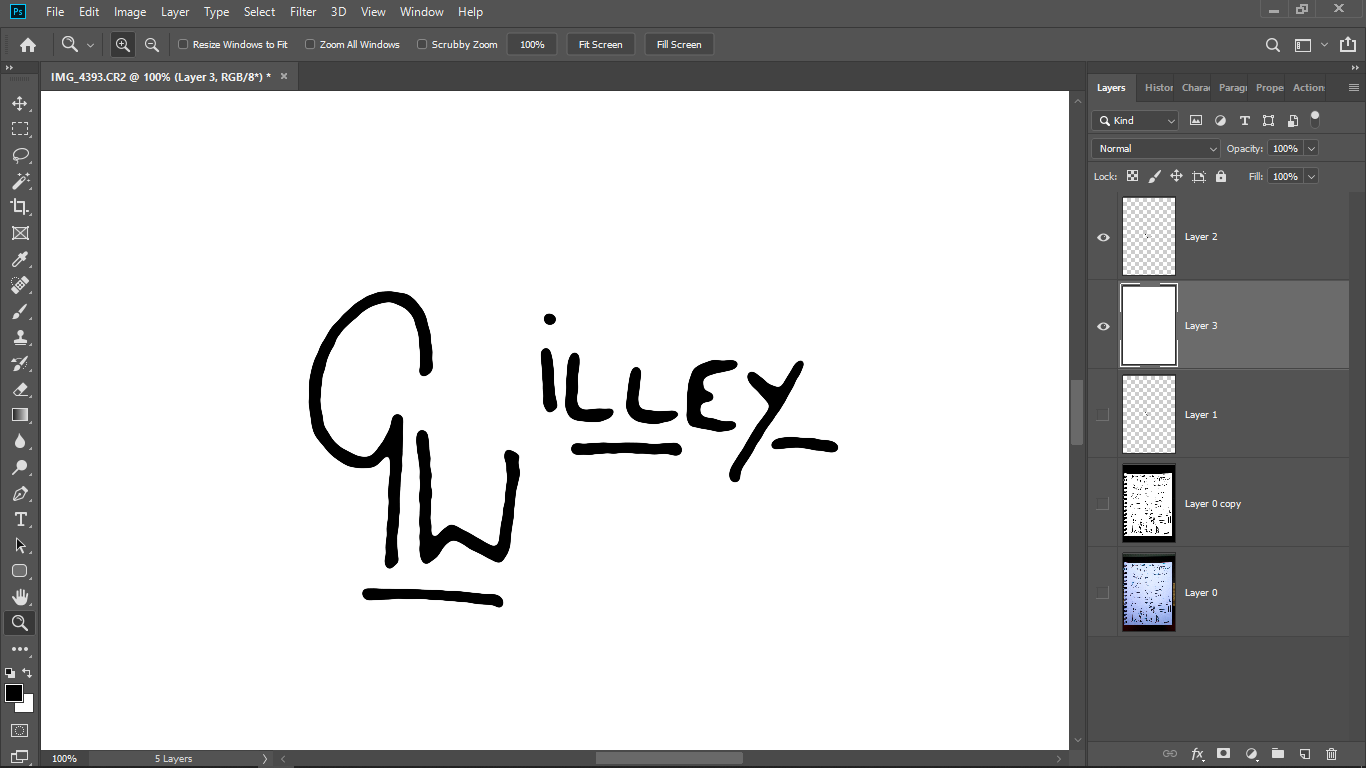
After this, use the Magic Want Tool to select the signature. Then put it on its own Layer.
Your signature will have very jagged edges. You may want to keep it like that to give a more hand-written effect. However, if you want a smooth signature, select the pixels in the signature Layer and go to Select > Select and Mask.
At this point, most people would use the Smooth dial to smoothen it. But actually, I prefer dragging the Contract dial to 100% and then slowly dragging the Feather dial up, until you get the smoothness you want. Press Okay.
Then create a new Layer and fill the selection with black. Create another new layer under that and fill it with white, which will give you a background.
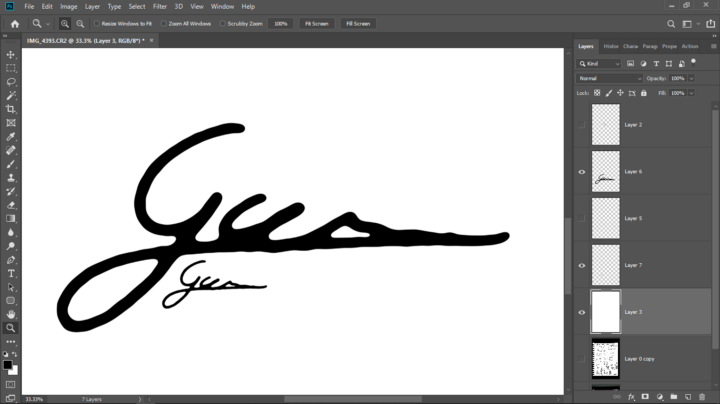
Now you’ll see exactly what your digital signature looks like. If you’re not happy, feel free to repeat the process with a different one. Or, if you feel you can rescue it, use the tools at hand to do so.
2.2 Expand
Before you export, you may find that your signature is too small. If you’re just using it for email or digital documents, that’s fine. If you intended on printing it, it’ll need to be expanded.
The best way to do this is to vectorize in Adobe Illustrator. Don’t worry if that’s not an option. Here’s how to do it in Photoshop.
Use the move tool to physically enlarge the signature. At this point, it will look fuzzy, but we’re going to use the Contrast & Feather trick to sort this out.
Go to Select > Select and Refine. Drag the Contract dial to 100%. Then drag the Feather dial up until you’re happy with the sharpness and smoothness of the edge. Press Okay. Create new Layer. Fill with black. Done!
3. Export
The hardest bit is over. All you have to do now if export your signature and start using it as you please.
I recommend saving as PNG. This file type is uncompressed and high in quality, while being compatible with most software and websites.
Export a full-res 300ppi version for printing, as well as a low-res 72ppi version for emails and digital documents.
If you have any questions at all, feel free to comment below and I’ll reply to it as soon as possible.
Authentic feedback and reviews to guide you in your purchasing decisions.
Advice on how to make the most of social media with graphics.
Responsive site, fantastic to navigate both on desktop and mobile.
User-friendly interface, making online shopping a seamless experience.
Excellent customer support, always available to help with any questions.
Pingback: Chen Wei